Material preparation
- A pair of basic shoes: Choose a pair of basic shoes that are comfortable and fit as the basis for making diamond boots. Opt for an older pair of boots, or buy a simple pair of flat boots as a base.
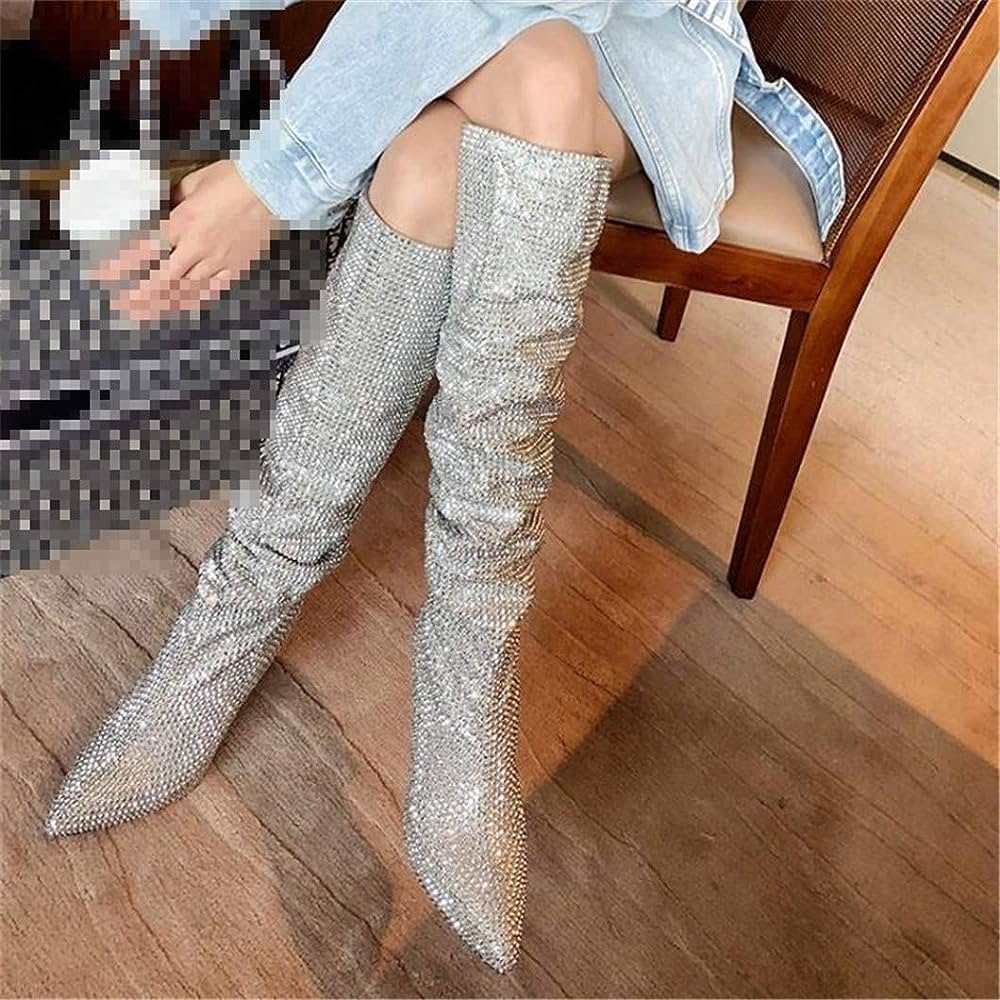
- Sparkling diamonds and decorative elements: Choose sparkling diamonds of different materials and colors according to personal preferences and creativity, such as crystals, sequins, etc. In addition, you can also prepare some decorative elements, such as pearls, sequins, etc., to increase the uniqueness of diamond boots.
- Glue and glue gun: Choose a glue suitable for leather and gemstones, and have a glue gun to facilitate the application of decorative elements.
- Scissors and pliers: Materials for trimming gemstones and decorative elements.
- Soft Cloth and Shoe Brush: For cleaning dust and dirt from shoes and surfaces.
Production steps
- Preparation: Clean the shoes, remove dust and dirt from the surface, and ensure that stones and decorative elements are firmly adhered to the shoes.
- Design pattern: Design the pattern of rhinestone boots according to personal preference and creativity. You can choose to have gems and decorative elements evenly distributed throughout the upper, or create specific patterns and patterns.
- Gem pasting: Use a glue gun to apply glue evenly on the bottom of the gem, and then stick the gem on the predetermined position on the upper. Follow the designed pattern and complete the pasting of all gemstones step by step.
- Paste the decorative elements: Use a glue gun to apply glue to the bottom of the decorative elements, and then stick the decorative elements on the upper in the appropriate position. There is an option to place decorative elements around the stone to add depth and richness.
- Trim and adjust: Use scissors and pliers to trim and adjust the shape and length of gemstones and decorative elements as needed to fit the design.
- Drying and fixing: After completing the pasting of all gemstones and decorative elements. Place the diamond boots in a ventilated place until the glue is completely dry. Depending on the glue requirements, it may take several hours or more than a day.
- Cleaning and Maintenance: After finishing the production. Use a soft cloth and shoe brush to gently wipe and clean the surface of the diamond boots to maintain their beauty and brightness. Carry out regular cleaning and maintenance for the life of your shoes. Special care: Due to the special decorative elements of rhinestone boots, special care is required. Avoid prolonged exposure to sunlight to avoid fading or damaging the gemstone. At the same time, avoid friction with sharp objects to prevent decorative elements from falling off or being damaged. When not in use. It is best to store the Glitter Boots in a shoe box or cloth bag to preserve their appearance and quality.
- Create personality: In the process of DIY making flash diamond boots. You can create according to your personal preferences and creativity. Try different color combinations, pattern designs or add personalized decorative elements to make the diamond boots more personal and unique.
- Share and show: Once you’re done, share your creation with friends, family, or fashion lovers on social media. Show off your Glitter boots and let others admire and appreciate your creativity and craftsmanship.
Conclusion:
By making the DIY version of flash rhinestone boots, not only can meet personal fashion needs. But also can experience the fun and sense of accomplishment of handmade. In the process of making, you can use your creativity and imagination to create unique flash diamond boots. At the same time. The finished flash diamond boots are also a personalized fashion item that can make you stand out from the crowd. May wish to try the DIY of making flash rhinestone boots to show your fashion taste and creativity!